Friday 28 October 2016

SERVICE PROJECT


LUXERY RETAIL SPACE: Banana Republic, Polo Park Mall
NUMBER OF CUSTOMERS IN THE STORE: Up to 6
ATMOSPHERE: The atmosphere in Banana Republic was very simplistic and clean. Everything was displayed easily and nicely for clients, without over crowding the store or their product. The sections were also divided nicely so you could find the style you were searching for, and had everything there you would need to complete the look.
HOW LONG FOR ASSISTANCE: It took about 15 mins for assistance from a store employee, with me signalling someone over for assistance.
QUESTIONS THEY ASKED: The first question they had asked was “What are you looking for?”. After describing what it was I was searching for, they had asked what was my colour palette for my wardrobe and what are some favourite things I like to wear in my wardrobe, really getting an idea of my personal style.
LIKES: I really like how the store was displayed, being simple but effective. I did like the fact that they took the time to ask me questions about my personal style to help me find exactly what it was that I was looking for, 
DISLIKES: Things I disliked in the store was it did take some time to get help, and that was with me signalling someone over for assistance. The clothing was also a little over priced and definitely not budget appropriate for the average customer.
WHAT WOULD YOU DO DIFFERENTLY IF YOU WORKED THERE: I would definitely try to be on top of helping out customers without shadowing or crowding them. With a store like that you would expect top notch service and attention, especially if you are doing a big shop. Other than that I found the store really nice and a good experience.


RESTURANT: Tim Hortons, Winnipeg Square Mall
NUMBER OF CUSTOMERS IN THE LOCATION: 15-20
ATMOSPHERE: Very hectic, loud and busy. Everyone seemed to be going at a fast pace and seemed to be rushed.
HOW LONG FOR ASSISTANCE: Took about 10 mins from waiting in line before it was my turn to order my food.
QUESTIONS THEY ASKED: They started off by saying “How can I help you today?” and after ordering my food asked “If that was everything?”. The end of the transaction was “How are you paying today?”.
LIKES: I liked that they all seemed to be working hard and were on top of providing fast service. They seemed to also be in a decent to good mood and were trying to represent there location the best way that they could.
DISLIKES: They seemed to be out of a lot of products (donuts, bagels, cookies, etc.) and the location itself was really small and congested. It wasn’t the most comfortable place to go an order coffee, but at the same time I get that their location is also a fast passed location for people on the go, as it is downtown.
WHAT WOULD YOU DO DIFFERENTLY IF YOU WORKED THERE: Working there, i would have definitely made sure that the bakers and employees were on top of keeping everything stocked for the clients and customers coming into the store. That way you can make sure every customer leaves happy and satisfied. I would have also found a way to make the store feel a little bigger, and not so small and claustrophobic.


ENTERTAINMENT SPACE: Human Rights Museum, 85 Isreal Asper Way
NUMBER OF CUSTOMERS IN THE MUSEUM: Roughly about 30
ATMOSPHERE: The atmosphere was very calm and quiet. It had a very relaxing feel while being there.
HOW LONG FOR ASSISTANCE: We were greeted as soon as we walked into the museum when we paid for our admission.
QUESTIONS THEY ASKED: The girl at the front desk asked “How can I help you today?” and “If you have been here before”.
LIKES: I really loved the architecture of the museum. I also really enjoyed how each section was clearly labeled and defined as different parts of human rights. The information as well was all there and was very interesting. Really helped me learn a lot about different human rights movements and times in our history.
DISLIKES: There were some areas of the museum that were blocked off which kind of threw off the vibe of the location. There also was no parking except for the forks, so we did have to walk a bit to enter the location.
WHAT WOULD YOU DO DIFFERENTLY IF YOU WORKED THERE: I would have just made sure that renovations were finished in the museum and that there was closer parking for clients, especially elderly clients and handicapped clients. It would make things easier for customers and clients coming to visit the museum.


HOW WOULD YOU TREAT YOUR GUESTS WITH YOUR BUSINESS:
If I was to have my own salon there are many important things I would make sure to implement in my business. First being that customers and clients are number one priority. You always was your clients to feel welcomed and genuinely happy to see them and appreciate their business. I would also make sure all my employees were curious and respectable to clients. They reflect your business as a whole and help provide the image.
Dress code would always have to be clean and professional, but obviously letting my employees have a bit of taste of their personality in it. Body language would always have to be warm and welcoming. There is nothing worse than feeling like you are bothering someone when you are a client, and I am a firm believer in treating people with happiness and fairness.
The store/salon itself would always be kept neat and clean. I am also a bit of an OCD freak and I would make sure that everything was in its place and very clear and easy for clients to navigate through the salon if they wanted to shop or take a look at the location. 
I would always make sure to ask them appropriate and detailed questions such as “Have you been here before?”, “What kind of services have you had?”, “What can you do to make you have a great experience today?”, and detailed questions about their personality and style to really give them a great final product and experience. 

I lastly would make sure while they are finishing up their service, to always ask for feedback on our the salon can improve their services, and make their next experience that much better, but making sure to keep an open mind about their feedback and opinions. They are going to help make or break your business, and it is very important to keep that happy and wanting to come back to visit your location, because they can go to any other salon for the same service, but you are the defining point in making sure they come back to your specific location and to see you.

Friday 16 September 2016

PROCEDURE CARDS UNIT 2

French Twist


Equipment Needed:
-Curling Iron
-Sectioning clips
-Heat Resistant comp
-Paddle Brush
-Hairspray
-Bobby Pins

Client Preparation:
Start off by doing your consultation with your client. Look at different pictures of different french twists so they can get an idea of what they would like, as you can build on and add to a french twist. Once you have gone over with your client what you will be doing, feel free to drape your guest even though it is not necessary. Once you have completed your stress relieving ritual, begin to set your rollers.

Setting Your Clients French Twist Base:
Starting at your clients nape, you will start taking sections and curling your section in the direction of the twist with your curling iron. Make sure you use your heat resistant comb to protect your clients scalp and be underneath your curling wand. You can also use this to pull the curl off of your curling iron. Once the hair is curled, you want to re curl it with your fingers and clip it on base. You will continue this process all throughout the back of the head. Once on your clients left side, you want to do the curls in the same direction as the previous curls on the back of the head. On the right side you want to set your curls in the opposite direction. At the top of the head, you just want to set the curls in sections curling the rod and curls away from you. After the curls are all done, feel free to spray a little hair spray in to set the curls. Once they have been set and cooled down, take out the clips and brush out your curls.

Doing The French Twist:
You want to create two sections, with the line diving the section at the _______ bone, you want to comb all the hair at the back of the head in which ever side the would prefer the french twist to be rolled on. Once hair is all brushed to one size, take a small piece in the middle of the nape hair line and leave hanging. You want the re enforce the hair by bobby pinning an “X” in the middle of the back of the head. Once you have reinforce you want to start rolling the hair in a circle motion or a wave in the ocean. Start pinning it over top of where your “X” is, adding to the build of the curl to the top of the head. Once you have the twist finished and pinned in place feel free to hairspray it. Now take the top section you have at the the top of the head and feel free to add it and build it into your french twist. Feel free to add braids and other things to add character in the french twist.


_________________________________________________________________________________


Round Layers


Equipment Needed:
-Sectioning clips
-Sheers
-Sectioning Comb
-Blow Dryer
-Appropriate styling, prep product

Client Preparation:
Start off by doing your consultation with your client. Look at different pictures of different of round layers to get an idea of what your clients has decided on. After you have decided on the type of cut you will be doing, drape your client with a towel around their neck to avoid getting their clothes wet and covered in hair. Once your client has been draped, preform your stress relieving rituals to ensure you client is relaxed for their hair cut. After you have preformed your stress relieving ritual, take your client to the sinks and preform a shampoo and conditioner. Now your client is ready for their cut.

Sectioning and Cutting Your Clients Hair:
You want to section your clients hair into four quadrants. Standing at the front of the client, you want to undo your two sections on the top of the head and take a horizontal sub section at the front hairline. You want to elevate the hair to line up with your chest as a guideline with even tension. Once the hair has been elevated, cut off the desired length along the whole horizontal sub section. This will be your guideline. Once completed you want to take another horizontal sub section, but this time lining it up with your chin. Continue this process by lining up the next subsections with your mouth and then nose. The top is now complete. Moving to the back of the head, you want to take pie shaped vertical sections, combing in previously cut hair from your previous section as a guideline. Continue this process as you slowly move to the centre of the back of the head. Repeat this process on the other quadrant. Your cut is now complete

Finishing Touches
Apply the appropriate prep and style product to the damp hair and do a wrap dry. I would suggest using a round brush blow out to play onto the cut and really shape the face nicely. Finishing your consultation with some makeup and a thank you to your client. 


_________________________________________________________________________________
Colour Mixing Chart


________________________________________________________________________

Colour Cleanse 


Equipment Needed:
-Hair Clips
-Colour Bowl
-Colour Brush
-Colour Cleanse Formula
-Cotton
-Tail Comb
-Colour Comb
-Gloves
-Hair Clips

Formulas:
Remove Tone:
30g Enlightener Powder + 30g Shampure Shampoo + 30g Hot Water
Lighten 1 Level
30g Enlightener Powder + 30g Shampure Shampoo + 30g Color Catalyst 10 Volume
Lighten 2, Levels
30g Enlightener Powder + 30g Shampure Shampoo + 30g Color Catalyst 20 Volume
Lighten 3, Levels
30g Enlightener Powder + 30g Shampure Shampoo + 30g Color Catalyst 30 Volume

Client Preparation:
You want to start off by doing your consultation. Once you have established the type of colour cleanse you will be doing with your client, you want to make sure that you drape your client with a towel and pop up to prevent any colour or water getting on their clothing. You want to separate their hair into your four quadrants while their hair is dry.

Applying Your Colour Cleanse Formula:
You want to start at the back of the head. In your first quadrant, you want to take a diagonal sub section starting at the bottom, saturating the previously colour hair, and making sure you are not overlapping on the natural regrowth of the hair. If there is regrowth, you want to place a cotton in between subsections to make sure the regrowth doesn’t get saturated in the colour cleans formula. Once completed repeat this process on the other back quadrant. Re saturate any dry areas on the previously cleansed hair. Once your back 2 quadrants have reached their desired level, you can wash out the back two. Repeat this process in the front sections, with your subsections parallel to the floor. Once they have dried, wash out.

Finishing Touches:
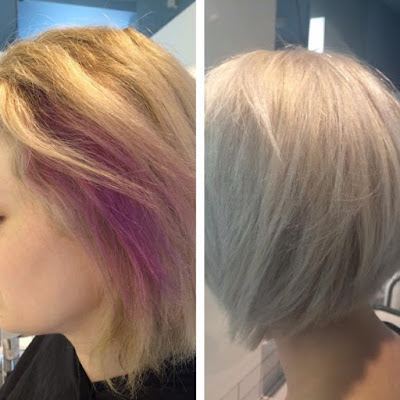
Once the cleansing formulas have all been washed out, you want to blow dry their hair. Then you are able to apply their desired colour  over top of their cleansed hair following your hair colour application procedure card. Feel free to finish the service with a hot tool style or botanical treatment to give them the best possible hair after a chemical treatment.


_________________________________________________________________________________

Botanical Treatment


Equipment Needed:
-Botanical Treatment/Concentrates
-Cape
-Towel
-Sectioning Clips
-Oils

Client Preparation:
Start off by doing your consultation and figure out what Treatment and oil would be best suited for your client. Once you have figured out what is the best treatment for your client, make sure to towel your clients neck and drape them to ensure no treatment, oil or water gets onto their clothing. Next you want to section your clients hair into 4 quadrants.


Doing Your Botanical Treatment:
You want to apply drops of oil through out their entire scalp applying around 30. You then want to message all the oil into the scalp joining all the oil eventually. Make sure to take your time massaging the oil into the clients head. Once you have done your massage, shampoo the oil out of your clients hair.  Once the hair is towel dried, apply the Botanical Treatment throughout the hair and come through so hair is evenly saturated. Let it sit in 5-1o minutes. Once the time is up, rinse out the botanical treatment with as hot of water as your client can handle. Finish up your consultation with your client and discuss the process you went through and what it does to the hair.


JOURNAL ENTRIES UNIT 2

TUESDAY, AUG. 16:
We started off the day today doing our colour review on deposit only, pure pigment, and our colour catalyst for our test. I feel pretty confident in doing the colour test, its just learning the proper placement of o/r, r/v, and all those other pure pigments that I want to make sure I get right for the test. In the afternoon we went recruiting to The Forks. It was kind of intimidating approaching strangers to clientele them but it was a cool experience!

WEDNESDAY, AUG. 17:
Today was our colour test in the morning. I feel like I did really good at it. I studied hard and I hope that it shows off. We also got to do our first graduation cuts. Its funny because before coming to hair school when I looked at bobs, they all looked the same to me. Now learning all these different techniques they all look so different to me. I always love a day that we do hair cutting and this was no exception. It turned out amazing and El Jay said it was the best one I’ve done so far, so it definitely boosted my confidence.

THURSDAY, AUG. 18:
Today we got to do up styles all day. To be honest, I have never done an up style and it is all super intimidating to me. We started off with a pony tail and a chigon which went really awesome. Now the last one, the french twist was super hard for me. It was frustrating to see everyone else grasp it quicker than me but at the same time it was my first try and I don’t think I did too bad for it.

FRIDAY, AUG. 19:
I absolutely loved todays cut. I’m obsessed with the the short round layers we did today or as I like to call it, the shag. This hair cut was a lot of fun for the fact that it had lots of layers and dimension to it, and it reminded me of Rachel from Friends. There were obviously times during the cuts that I did have challenges and struggles with, but when it was all blown out with product, it looked really awesome and rock and roll. I loved it and am looking forward to the next one. 

SATURDAY, AUG. 20:
Today was our highlight model day. We started in the morning doing the highlights boot camp. I ended up taking an hour and a minute on mine but it wasn’t my best work. Next time I need to be really make sure I do the best job that I can. In the afternoon my client came in and we ended up doing some ELC and 30 vol highlights through out her hair. It turned out really good and she seemed pleased by it which I was super pumped about, The only thing was I needed to watch my saturation and make sure they were all evenly highlighted and covered.

TUESDAY, AUG. 23:
Long round layers was our cut today and I have to say it wasn’t too bad! The look of the hair cut itself I have definitely noticed it on tons of people, and the cutting of it was easier than I expected. I did unfortunately cut open one of my fingers when I should have been paying attention, but now I have learned my lesson. The cut did take all day, but I loved it when it was all finished and done, and it looked really timeless and sophisticated

WEDNESDAY, AUG. 24:
Today our focus was square layers above the shoulders. I usually am a huge fan of any kind of hair cut that we do, as cutting is one of my favourite things to do in the course, but man this was a hard cut to do. I think my biggest challenge is getting my cross over 1 and 2 mixed up, as well as the proper way to hold my scissors. Another thing about this hair cut was all the cross checking and going back into your sections to check everything. At times it confused me. We unfortunately didn’t get a chance or have time to finish it today.

THURSDAY, AUG. 25: 
Today we used our square layer mannequin and did our square graduation cut. We started off at the top this time though which has been different than a lot of the cuts we have done. The cut itself I loved and my mannequin ended up looking like Justin Beiber from 2013. I did screw up on the back right nape area and somehow cut off a chunk of hair off the mannequins hair. Me and Allison went through on what we thought went wrong and I’ll just have to watch my stance and elevation the next time I do that cut.

FRIDAY, AUG. 26:
We started off the morning doing our hair cutting written test. For the most part I think I memorized most of the terms that were going to be on the test but for some reason blanked on what over direction was. For the afternoon we got some time to practice our perms for the first time. Just like doing roller sets, I felt it was very time consuming, but easier to section and curl using perm rods then it was using rollers.

SATURDAY, AUG. 27:
Today was our deposit only model. My sister in law came in and we ended up doing a level 8 dark red from a level 5 dirty blonde. It was really cool to do the whole process on a human head instead of a mannequin head. I also feel like I am getting good handle on shampooing clients and the colour washed out nicely! I do have to have more practice washing the nape areas as that is the hardest area I find to wash and make sure all the product is out.

TUESDAY, AUG. 30:
Today we got to do an actual perm on our mannequins. Once again I wasn’t a fan or rolling the hair in the perm rods, and I can say that the scent of the perm solution made me want to puke. I did love the whole process of saturating the hair with the perm solution and then putting the neutralizer on. It was fun to pour mix recklessly over the hair. The finished product looked really cool once it was all done, although mine did look a little ratty and messy, versus curl and bounce.

WEDNESDAY, AUG. 31:
Today was such a chill day for our class. We got to start off the morning with lots of snacks and watch the documentary “Good Hair”. The documentary was funny and entertaining, but also was very educational about african american hair. Also the fact that some women will pay thousands of dollars of weaves is insane, and apparently is a business I need to get into. The afternoon we got to demo a relaxer on our previously permed mannequins. Unfortunately I had to leave early to go pick up my broken car, but it was fun while I was there.

THURSDAY, SEPT. 1:
Today was what I called the “perm day from hell”. El Jay gave us four different perms she wanted us to practice on through out the day. My partner today was Alyssa. I found the cluster perm wrap to be the hardest to do because of so many overlapping parts of the perm. Everything else was pretty easy and straight forward. All I gotta say is I am good for doing perms for the rest of my life.

FRIDAY, SEPT. 2:
I am super excited about today. Today is our classes first hair day. I am partnered up with Brandie and Shayla. We decided that I would go first in the morning. I decided on getting rose gold highlights as well as a soft fade. I turned out awesome and Shay and Brandie killed it. Once that was done We worked on Brandie’s hair in  the afternoon by giving her a honey blonde ombre. It turned out super solid and Brandie was really pumped about it, which made us feel awesome.

SATURDAY, SEPT. 3:
For the morning to day we did a wellness with Coleen for minute to win it. It was hilarious and fun to play some games in the morning and get everyone in a good mood, and it was fun to see everyone laughing and having a good time. Afterwards we spent the morning going over colour again in the classroom and working through some scenarios. The afternoon we had time to work on quotas. I kept practicing my french twists as it needed some brushing up on. It still needs some work but I am getting the dexterity of it a little bit better.

TUESDAY, SEPT. 6:
Today we started the day off of doing an alpha perm wrap. I feel like I am getting really good at doing perm wraps. My sections seem to be really clean and the perm rods seem to be tight and consistent which is solid. The afternoon we had time working on quotas. I continued working on my up do’s including a french twist. This time I incorporated a braid into it to really change it up a little bit and add some dimension into the up do.

WEDNESDAY, SEPT. 7:
We started off the day working on a new perm wrap, the spiral wrap. This wrap was easy to do but seemed to look a lot more messier than the alpha wrap we have previously done before. I had some personal stuff going on so I wasn’t super into it, so I’m hoping the next time we do get a chance to do it I will be a little more into it and observe what I am doing a bit more. The afternoon we had time to do quotas. I worked on my blow outs and curling to help build my dexterity and technique.

THURSDAY, SEPT. 8:
Thursday was our first exam day. Today’s exam was a one length above the shoulder. I did a square one length on my model today. It turned out amazing and really continued to build my confidence as a hair stylist, in the cutting aspect. The afternoon we had more quota time. I spent my time wisely by filling up the quotas I needed to do, and then spent the last our working on my project and procedure cards.

FRIDAY, SEPT. 9:
Today was our first guest day. I had a client named Sheryl who I actually recruited at shoppers drug mart. She was un sure of what kind of hair cut she wanted so we decided to do a subtle cut with concave round layers, and then do a round brush blow out to really give nice volume to her hair. She seemed really happy about it which is awesome! 

SATURDAY, SEPT. 10:
The morning I started off with my client Monique. We did concave layers once again but also did some ELC highlights with a red tone to really compliment her level 8 virgin hair. It turned out super solid but wish I could've given her hair some extra volume. The afternoon I had a client I didn't know named Jody and we did some off the roots highlights. I was super pumped with the finish and it was cool to learn something new. I wish though that the educators would've shown me how to do some beach waves because they didn't turn out the way I expected.

TUESDAY, SEPT. 13:
Today was all about extensions and braids. My braiding skills have been getting better but still not up to par with some of the other students in the class. Doing a cornrow braid was super hard especially learning how to do it under hand as I usually do it over hand. I eventually got the motions of it but just need to practice on getting it more tidy and clean.

WEDNESDAY, SEPT. 14:
The morning was our round layer exam. My model was my friend Ninya and I ended up with an 85% on it which I was pumped about. The cut itself went super easily just need to talk about my product a little more and work on my blow outs and flat iron. The afternoon I practiced my beach waves and they turned out really nice! I loved them and can't wait to do more.

THURSDAY, SEPT. 15:

Today was our triangle layers exam. I ended up with an 88% and it turned out super nice. I am not the biggest fan of the look of triangle layers but she really liked them. She rebooked an appointment for the next morning cause she wanted the same style but in a bob form. The afternoon I worked on my quotas for the week which included a perm alpha wrap and braids.

FRIDAY, SEPT. 16:
Today was our first full guest day on a Friday. My client from my triangle layer exam was suppose to come and get her bob done but ended up not showing up which I was bummed about. I was excited to do a triangle bob with layers on someone but I guess I will have to wait for the next client that wants that. The afternoon I ended up doing Ashley's friends hair in the afternoon with just a trim and layers, then styled it in beach waves. I realized Phermoliant is my new favourite product for styling!

SATURDAY, SEPT. 17:
The morning I had my client Rachelle in to do a colour application and a one length triangle cut. I loved the finish result of and it really suited her face shape. It was definitly my best client cut yet and I can't wait to do more client days! The afternoon was spent working on quotas but I decided to work on my up do's and trying to perfect it.

Thursday 15 September 2016

PUNK HAIR ERA BY BRETT VISCA


WHY IS THE PUNK HAIR ERA IMPORTANT


       The reason I have chosen the Punk era, which originated in the 1960’s (but grew popularity in the 1970’s) is because not only has it influenced a lot of my personality, fashion, and creativity, but it has also influenced a lot of different aspects in the beauty world. The punk hair era is what really brought in bright fashion hair colours, faux hawks, short bangs, among other things. The era as a whole has also influenced fashion designers such as Alexander McQueen, Vivianne Westwood, Jean Paul Gautier, and many more. In current time, Punk hair is more prominent then ever, being mixed with modern hair styles as well. With men its often the mohawk that has been modernized into a faux hawk, or slicked back hair styles. With women, the colour has been a huge influence, with companies coming out with wild colours including Aveda, Arctic Fox, Punky Colour, and many more. 

PUNK EVENT #1: THE BIRTH OF THE MOWHAWK IN MAINSTREAM FASHION


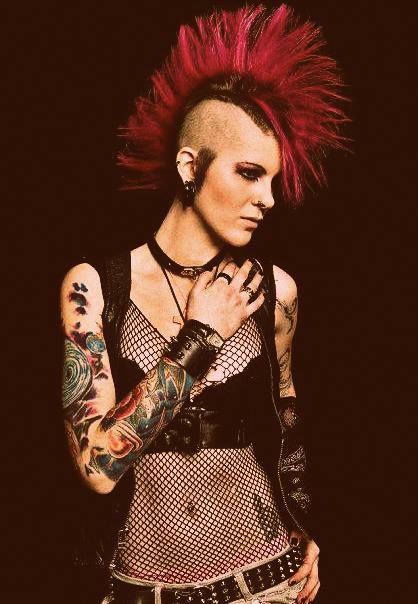
     Mohawks began to become a popular in the early 1970s. Mostly worn among males, although some females were brave to enough to do the hairstyle, was often a way for people to stand out from a crowd at concerts and shows. There were many different mohawk styles, but the two most common were the Liberty Mohawk or the Fanned Mohawk and always were worn in bright colours.


PUNK EVENT #2: MANIC PANIC


     Manic Panic is a huge trend setter in the punk movement and with hair colour today. They opened their first boutique in 1977 as not only a clothing store for the punk community, but also selling bright hair colours that were worn by many punks and rock celebs including Cyndie Lauper and Steven Tyler.  


     The brand Manic Panic itself has really changed the hair industry with its revolutionary hair colour brand that clients can do at home. The brand itself has over 20 different hair colours, and also sells cosmetics, clothing, wigs, and many outrageous things for the punk community. At the time, the store was the first and only store of its kind to have a boutique and mainstream retail market.


PUNK EVENT #3:

TRENDSETTER #1: SID AND NANCY


     Sid and Nancy were known as punk icons in the 70’s with a wild romance. Besides all the media attention they received and the horrible end to their relationship, the were huge influences in punk fashion and culture. 
     Sids hair was known for the messy out of bed look. His hair was always spiked, chopped and messy, with a black tone, which really added to attitude of punk culture. His cut I would say would be considered squared layers, and a level 1-2 colour. His fashion sense consisted of tight jeans and his signature leather jacket. 
     Nancy was known for her bleach blonde hair, which would be a level 1-2. Her hair was always in tight curls, looking like a perm, and a blunt fringe just around the brow area. She was one of the first women in media to rock bleach blonde, borderline white hair, and has been mentioned on influencing rock women hair styles like Courtney Love, Gwen Stefani, and many more. Her hair never looked over styled or had a lot of product in, it often looked messy and low maintenance. Her fashion sense consisted of her signature leather jacket, leopard print apparel, and tight fitting jeans.  


TRENDSETTER #2: SOOO CATWOMAN


     Sooo Catwomen rose to attention with the punk movement in the mid 1970’s in the UK. She is known more so for being a socialite. She has become on of the most known women in the punk movement and her hairstyle has started a lot of trends in the punk scene for women. Her hair style consisted of the top and back of her head being shaved and enlightened to a blonde, and the sides of her hair being cut at a short-mid length and spiked all the way up, also dyed black, resembling a cat. The hair trend itself has opened up the doors to women punk hair styles like “the chelsea” and “liberty spikes”. Her fashion consisted of overfit blazers with pins and buttons, black boots, and ripped up shirts. She was so popular she even had a movie based on her life which came out in the 1980’s.


TREND SETTER #3: TISH AND SNOOKY A.K.A MANIC PANIC


   Tish and Snooky started off their careers as backup singers for the famous rock group Blondie, but the sisters decided to do a career change. In 1977 they opened the first punk boutique called Manic Panic. The store was worn by many rock celebs including Steven Tyler, Debbie Harry, and Cyndi Lauper. They expand into the infamous hair brand that is known all around the world today. There hair styles were always bright hair colours ranging from orange, purple, pink, red and many other colours.


NEW TRENDS THAT EMERGED IN THE PUNK ERA


     There were a lot of new trends that had started with the punk hair era. The biggest one that has continued on into this day is bright hair colours. This era is what made it main stream to have brightly coloured hair. Back in the seventies it was very uncommon for people to have purple, blue or red hair, but those in the punk movement all wore it as a uniform to stand out from other people. 


     The mohawk has also influenced a lot of different hair styles including the faux hawk, fro hawk, and has been used in past and current high fashion up styles for editorials in magazines. 


     Lastly, it really paved the way for women to feel confident wearing any kind of hair style or colour, and still feel like a woman but with edge. It started outrageous hair cuts like the chelsea, bettie page bangs, and many others. It has now influenced hairstyles worn by celebrities like Cassie, Kelly Osborne, Hayley Williams, and many more.


TRENDS, FASHION, AND MAKEUP OF THE PUNK ERA