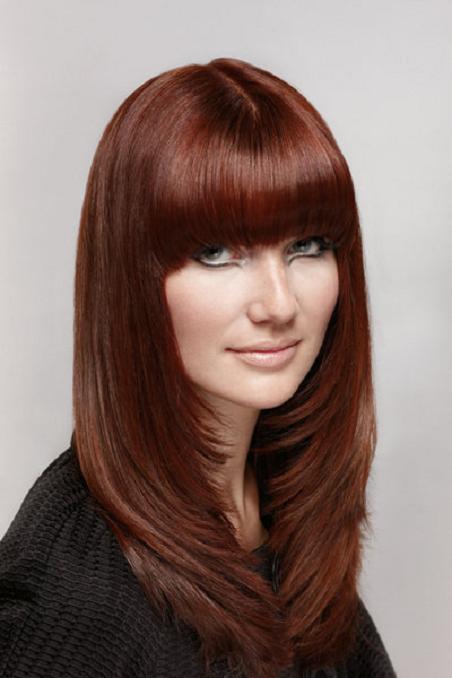
French Twist

Equipment Needed:
-Curling Iron
-Sectioning clips
-Heat Resistant comp
-Paddle Brush
-Hairspray
-Bobby Pins
Client Preparation:
Start off by doing your consultation with your client. Look at different pictures of different french twists so they can get an idea of what they would like, as you can build on and add to a french twist. Once you have gone over with your client what you will be doing, feel free to drape your guest even though it is not necessary. Once you have completed your stress relieving ritual, begin to set your rollers.
Setting Your Clients French Twist Base:
Starting at your clients nape, you will start taking sections and curling your section in the direction of the twist with your curling iron. Make sure you use your heat resistant comb to protect your clients scalp and be underneath your curling wand. You can also use this to pull the curl off of your curling iron. Once the hair is curled, you want to re curl it with your fingers and clip it on base. You will continue this process all throughout the back of the head. Once on your clients left side, you want to do the curls in the same direction as the previous curls on the back of the head. On the right side you want to set your curls in the opposite direction. At the top of the head, you just want to set the curls in sections curling the rod and curls away from you. After the curls are all done, feel free to spray a little hair spray in to set the curls. Once they have been set and cooled down, take out the clips and brush out your curls.
Doing The French Twist:
You want to create two sections, with the line diving the section at the _______ bone, you want to comb all the hair at the back of the head in which ever side the would prefer the french twist to be rolled on. Once hair is all brushed to one size, take a small piece in the middle of the nape hair line and leave hanging. You want the re enforce the hair by bobby pinning an “X” in the middle of the back of the head. Once you have reinforce you want to start rolling the hair in a circle motion or a wave in the ocean. Start pinning it over top of where your “X” is, adding to the build of the curl to the top of the head. Once you have the twist finished and pinned in place feel free to hairspray it. Now take the top section you have at the the top of the head and feel free to add it and build it into your french twist. Feel free to add braids and other things to add character in the french twist.

_________________________________________________________________________________
Round Layers

Equipment Needed:
-Sectioning clips
-Sheers
-Sectioning Comb
-Blow Dryer
-Appropriate styling, prep product
Client Preparation:
Start off by doing your consultation with your client. Look at different pictures of different of round layers to get an idea of what your clients has decided on. After you have decided on the type of cut you will be doing, drape your client with a towel around their neck to avoid getting their clothes wet and covered in hair. Once your client has been draped, preform your stress relieving rituals to ensure you client is relaxed for their hair cut. After you have preformed your stress relieving ritual, take your client to the sinks and preform a shampoo and conditioner. Now your client is ready for their cut.
Sectioning and Cutting Your Clients Hair:
You want to section your clients hair into four quadrants. Standing at the front of the client, you want to undo your two sections on the top of the head and take a horizontal sub section at the front hairline. You want to elevate the hair to line up with your chest as a guideline with even tension. Once the hair has been elevated, cut off the desired length along the whole horizontal sub section. This will be your guideline. Once completed you want to take another horizontal sub section, but this time lining it up with your chin. Continue this process by lining up the next subsections with your mouth and then nose. The top is now complete. Moving to the back of the head, you want to take pie shaped vertical sections, combing in previously cut hair from your previous section as a guideline. Continue this process as you slowly move to the centre of the back of the head. Repeat this process on the other quadrant. Your cut is now complete
Finishing Touches
Apply the appropriate prep and style product to the damp hair and do a wrap dry. I would suggest using a round brush blow out to play onto the cut and really shape the face nicely. Finishing your consultation with some makeup and a thank you to your client.
_________________________________________________________________________________
Colour Mixing Chart


________________________________________________________________________
Colour Cleanse

Equipment Needed:
-Hair Clips
-Colour Bowl
-Colour Brush
-Colour Cleanse Formula
-Cotton
-Tail Comb
-Colour Comb
-Gloves
-Hair Clips
Formulas:
Remove Tone:
30g Enlightener Powder + 30g Shampure Shampoo + 30g Hot Water
Lighten 1 Level
30g Enlightener Powder + 30g Shampure Shampoo + 30g Color Catalyst 10 Volume
Lighten 2, Levels
30g Enlightener Powder + 30g Shampure Shampoo + 30g Color Catalyst 20 Volume
Lighten 3, Levels
30g Enlightener Powder + 30g Shampure Shampoo + 30g Color Catalyst 30 Volume
Client Preparation:
You want to start off by doing your consultation. Once you have established the type of colour cleanse you will be doing with your client, you want to make sure that you drape your client with a towel and pop up to prevent any colour or water getting on their clothing. You want to separate their hair into your four quadrants while their hair is dry.
Applying Your Colour Cleanse Formula:
You want to start at the back of the head. In your first quadrant, you want to take a diagonal sub section starting at the bottom, saturating the previously colour hair, and making sure you are not overlapping on the natural regrowth of the hair. If there is regrowth, you want to place a cotton in between subsections to make sure the regrowth doesn’t get saturated in the colour cleans formula. Once completed repeat this process on the other back quadrant. Re saturate any dry areas on the previously cleansed hair. Once your back 2 quadrants have reached their desired level, you can wash out the back two. Repeat this process in the front sections, with your subsections parallel to the floor. Once they have dried, wash out.
Finishing Touches:
Once the cleansing formulas have all been washed out, you want to blow dry their hair. Then you are able to apply their desired colour over top of their cleansed hair following your hair colour application procedure card. Feel free to finish the service with a hot tool style or botanical treatment to give them the best possible hair after a chemical treatment.

_________________________________________________________________________________
Botanical Treatment

Equipment Needed:
-Botanical Treatment/Concentrates
-Cape
-Towel
-Sectioning Clips
-Oils
Client Preparation:
Start off by doing your consultation and figure out what Treatment and oil would be best suited for your client. Once you have figured out what is the best treatment for your client, make sure to towel your clients neck and drape them to ensure no treatment, oil or water gets onto their clothing. Next you want to section your clients hair into 4 quadrants.
Doing Your Botanical Treatment:
You want to apply drops of oil through out their entire scalp applying around 30. You then want to message all the oil into the scalp joining all the oil eventually. Make sure to take your time massaging the oil into the clients head. Once you have done your massage, shampoo the oil out of your clients hair. Once the hair is towel dried, apply the Botanical Treatment throughout the hair and come through so hair is evenly saturated. Let it sit in 5-1o minutes. Once the time is up, rinse out the botanical treatment with as hot of water as your client can handle. Finish up your consultation with your client and discuss the process you went through and what it does to the hair.

No comments:
Post a Comment